HOMEMADE HIGH-PROBIOTIC ORGANIC GREEK YOGURT (INSTANT POT DIRECTIONS INCLUDED)
Updates for High-Probiotic Yogurt Recipe 2021:
*Youtube video: https://youtu.be/Cgq6nkvYlSU
*Instant Pot Directions: See below (under conventional recipe).
Original Post:
What can you get with $75? Turns out, in the healthy food world, not much. A few years back, I calculated how much of my grocery budget I spent on yogurt. Since my husband, I, and both my boys eat it every day, and I’m strict about organic when it comes to dairy, we were nearing $2.50-$3.00 per day – $75.00 per month! On yogurt.

One gallon of milk in large pot. Bring up to 185 deg F x 15 minutes, remove from heat and cool to 100-110 deg F.
Sure, I consider it a SuperFood that’s a staple in my household. And, I love it. Mixed with fruit and nuts, it’s a great breakfast, recovery-fuel, or snack. Mix it with other easy-to-digest carbs and you have a great pre-training snack (smoothies are my preferred pre-training/pre-racing fuel source as they are liquid, so they are digested quickly and easily, and you can pack a lot in them). But worth $75, really? Then, I discovered th
is recipe, and it changed my life (a little dramatic, I know). I have been happily frugal ever since:
Recipe of the week: Homemade, High-Probiotic Yogurt
Ingredients:
- 1 gallon (4 liters) organic or farm-fresh milk
- 1 cup plain organic yogurt

One cup starter yogurt + 1 cup cooled milk.
- candy thermometer
- big pot

Instructions:
1. Pour milk into a large pot.
2. Using a candy thermometer, bring milk up to 185 degrees and keep it there for 15 minutes (be careful not to let it boil-over, or you’ll have a mess). I’ve had a mess many, many times, and this is what I’ve discovered: On my gas range, it takes ~18 minutes to bring it up to 185 deg F. Find out for yourself, and then set a timer in the future.

After returning starter yogurt mixture back to pot, whisk well.
3. After the milk has been heated at 185 degrees for 15 minutes, remove from heat and allow to cool to ~110-115 deg F. This takes about 2 hours and can be done more quickly when set in a large bowl of ice.
*Maybe my house is just colder now, but I now find that it takes 1 hour to reduce the temperature to 110-115 deg F when I set the pot on a cooling rack. I generally set a timer and then check the thermometer so I don’t forget!
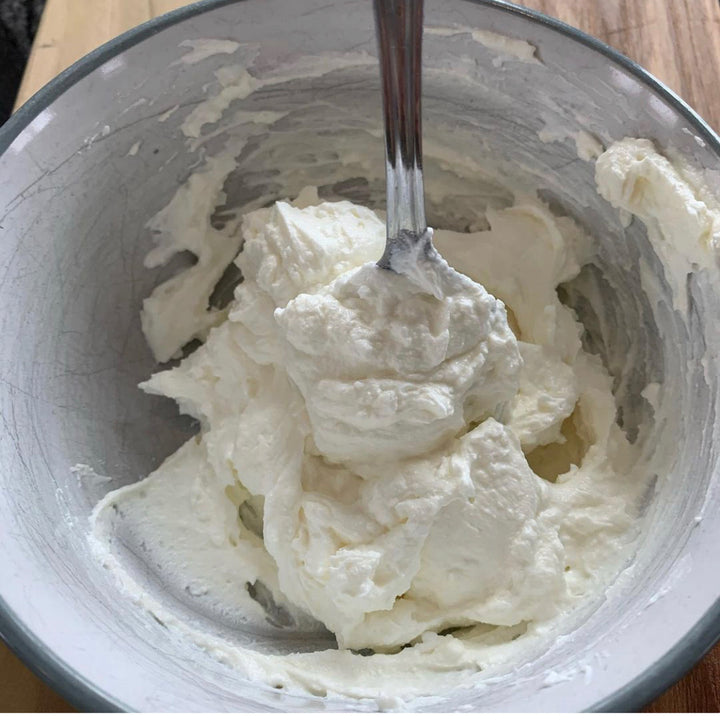
4. Once cooled, place the starter yogurt in a clean bowl. Once milk has cooled, pour ~1 cup into the bowl with the starter. Mix well (with whisk or fork). Pour mixture back into the pot and mix all milk/yogurt well (emphasis on very well). For subsequent batches, use homemade yogurt for starter yogurt.
***Maybe I’m getting lazier. Now I usually just dump the yogurt directly into the pot, without mixing separately first, and whisk the heck out of it. Works fine.
5. Heat oven to 105 deg F, or if it doesn’t go this low, place on lowest setting and then turn off once it’s reached this temperature.

Place yogurt in warmed oven for approx. 24 hours.
6. Place pot in oven and allow to ferment for 24 hours. If oven is turned off, place large towels or blanket around pot to insulate.
7. Refrigerate for ~4-8 hours or, for a thicker or Greek-style yogurt, strain in a (very clean)cloth-lined strainer until at desired consistency. Done.
Instant Pot Directions: After making yogurt on my cooktop and in my oven for over 10 years, I now use my instant pot and get amazing, consistent results. Here’s how.
Follow the directions above, but instead of heating on the stovetop to 185 deg, use either Sous Vie (185 deg for 15 minutes) or Yogurt High for 15 minutes.
Take IP liner out of instant pot and place on wire rack to cool.
Place IP liner back into Instant Pot and ferment at 115 deg F by either choosing Yogurt Low for 24 hours, or Sous Vie 115 deg F for 24 hours.
All else is the same. Delicious, beautiful high-probiotic homemade yogurt.
Approximate Price of HOMEMADE HIGH-PROBIOTIC ORGANIC GREEK YOGURT:
$0.47 per each of 16 servings (4-8 oz. each depending on straining)

Yogurt will be quite thick, but if desire even thicker Greek style yogurt, strain in colander over bowl for 3-5 hours. Make sure to place in refrigerator for straining.
$0.34 subsequent servings (4-8 oz. each)
Comments:
But why do all this work (which is actually not much in the way of actual work) when you could just bring yogurt home from the grocery store? Sure, we all know yogurt contains healthy bacteria, and these bacteria actual fight bad bacteria, keep yeast at bay, improve absorption of nutrients, and strengthen our immune systems. They help us digest foods, stay regular, and even
fight infections.
But why homemade? There are lots of reasons, and as I’m sure you’re well aware, I would love to share ALL of them with you:
1) When yogurt is allowed to ferment for 24+ hours, it contains significantly more live bacteria than commercial yogurt, which only ferments for approximately 4 hours. We’re talking more bacteria, as in billions more. The amount in 1 cup of your homemade yogurt will put any supplement or commercial yogurt to shame.

Yogurt, berries, walnuts, and just a drizzle of organic honey. My favorite way to start the day!
2) Virtually lactose-free. Long fermentation means that virtually all the lactose is converted to galactose. Galactose is much easier to digest, lactose-intolerant or not.
3) Next, you control the additives. This recipe lists no sugar, no colorings, no artificial flavorings, just a starter amount of plain yogurt and milk. Next time you’re at the store, take a look at the ingredients in commercial yogurt. Even “plain” ones often have thickeners and additives. Flavored and non-organic ones, forget about it!
Ten to 20 ingredients, most of which are not great for you. Ever looked at key lime Yoplait? Really, yogurt should not be that color.
4) Plain and simple, it will taste better. Plain commercial yogurt often has a sour taste. Not homemade. Who knows how long the commercial one has been on the shelf? Your yogurt will be as fresh as your milk, and you’ll taste the difference. If you get milk fresh from the farm, you’ll have the freshest yogurt on the block.
5) You’ve got options. If you’re allergic to milk or eat dairy-free, you can play around with other milks such as soy, almond, and coconut. Although it will take some experimentation to get the right texture, you will come away with a healthy, bacteria-loaded fermented whole food you can tolerate.
6) You’ll save money over regular organic plain dairy yogurt, and especially over specialties yogurts. Due to my children’s intolerances (yes, I’m one of those parents), I’ve gone dairy-free and soy-free while
nursing. Oh, and gluten-free. While training for a 100-mile 10,000+ feet elevation-gain mountain bike race, I ate anything allergen-free that I could get my hands on, including coconut milk yogurt. At $1.50 per 6 ounces, this indulgence didn’t last long. If only I’d had known how to be a happy yogurt-making hippy mountain biker then.
You don’t have to live on the prairie or in a tree house to love homemade yogurt. Once you get the hang of it, it’s easy, fun, and delicious. Give it a try. It doesn’t cost much and delivers big-time in the nutrition department.
Give your body what it needs for great energy and health every day and during training with the right Foods, Drinks and Supplements. If you would like my help with it, I offer comprehensive plans as Instant Downloads and as Custom Clients starting at just $20. And, as a FuelRightBlog reader, get a further discount with coupon code: password-frblog username-reader. I’d love to work with you!
Fuel Your Adventure. Nourish Your Body.